Step 1: Create an account
Start by creating a Runpod account to access GPU Pods and Serverless compute resources:- Sign up here.
- Verify your email address.
- Set up two-factor authentication (recommended for security).
Step 2: Deploy a Pod
Now that you’ve created your account, you’re ready to deploy your first Pod:- Open the Pods page in the web interface.
- Click the Deploy button.
- Select RTX 2000 Ada from the list of graphics cards.
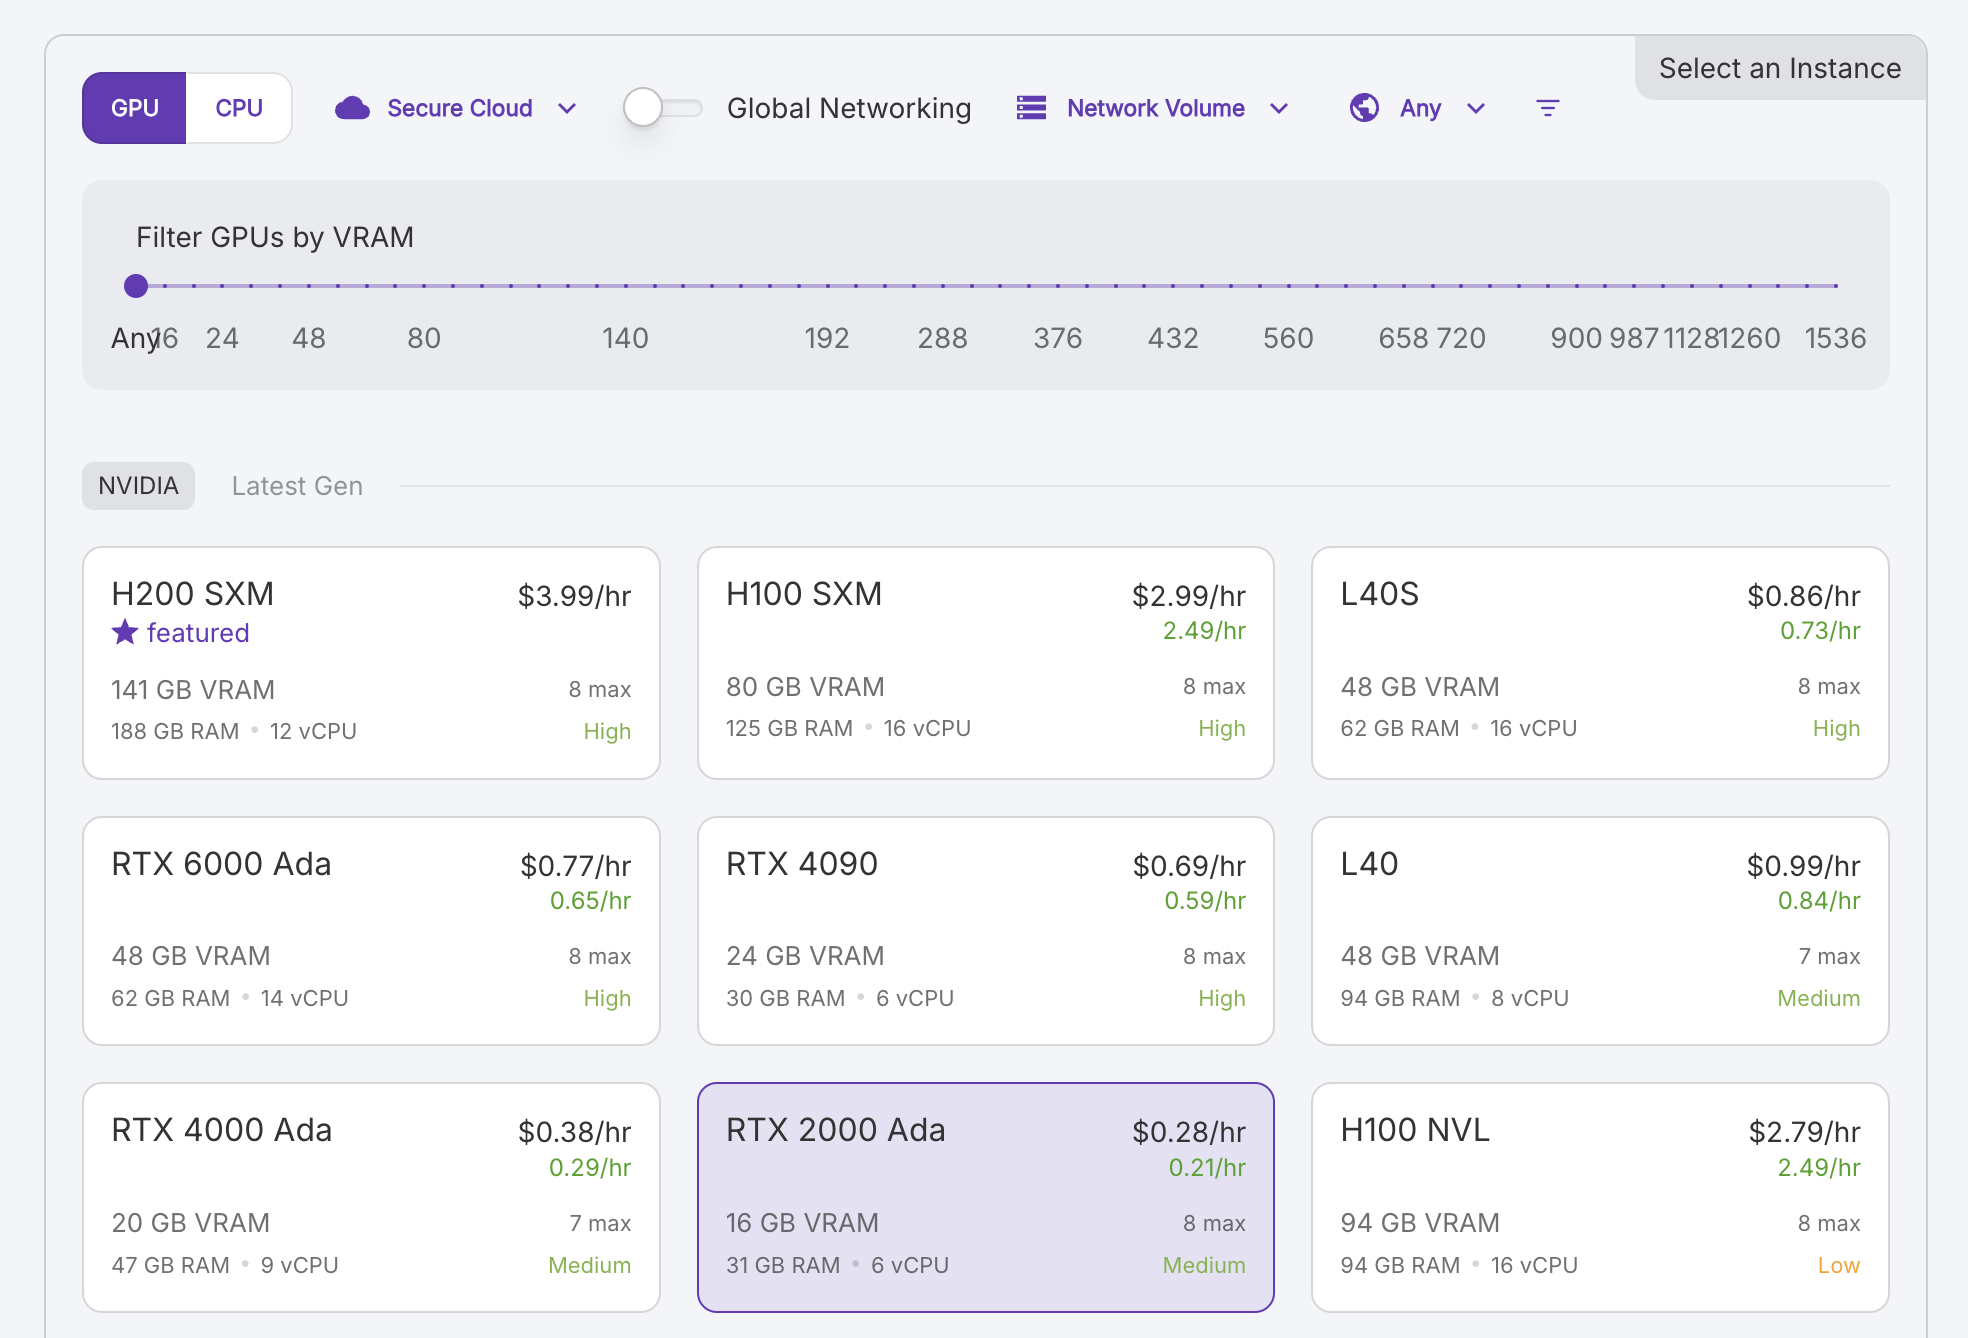
- In the Pod Name field, enter the name “test-pod”.
- Keep all other fields (Pod Template, Instance Pricing, and GPU Count) on their default settings.
- Click Deploy On-Demand to deploy and start your Pod. You’ll be redirected back to the Pods page after a few seconds.
If you haven’t set up payments yet, you’ll be prompted to add a payment method and purchase credits for your account.
Step 3: Execute code on your Pod with JupyterLab
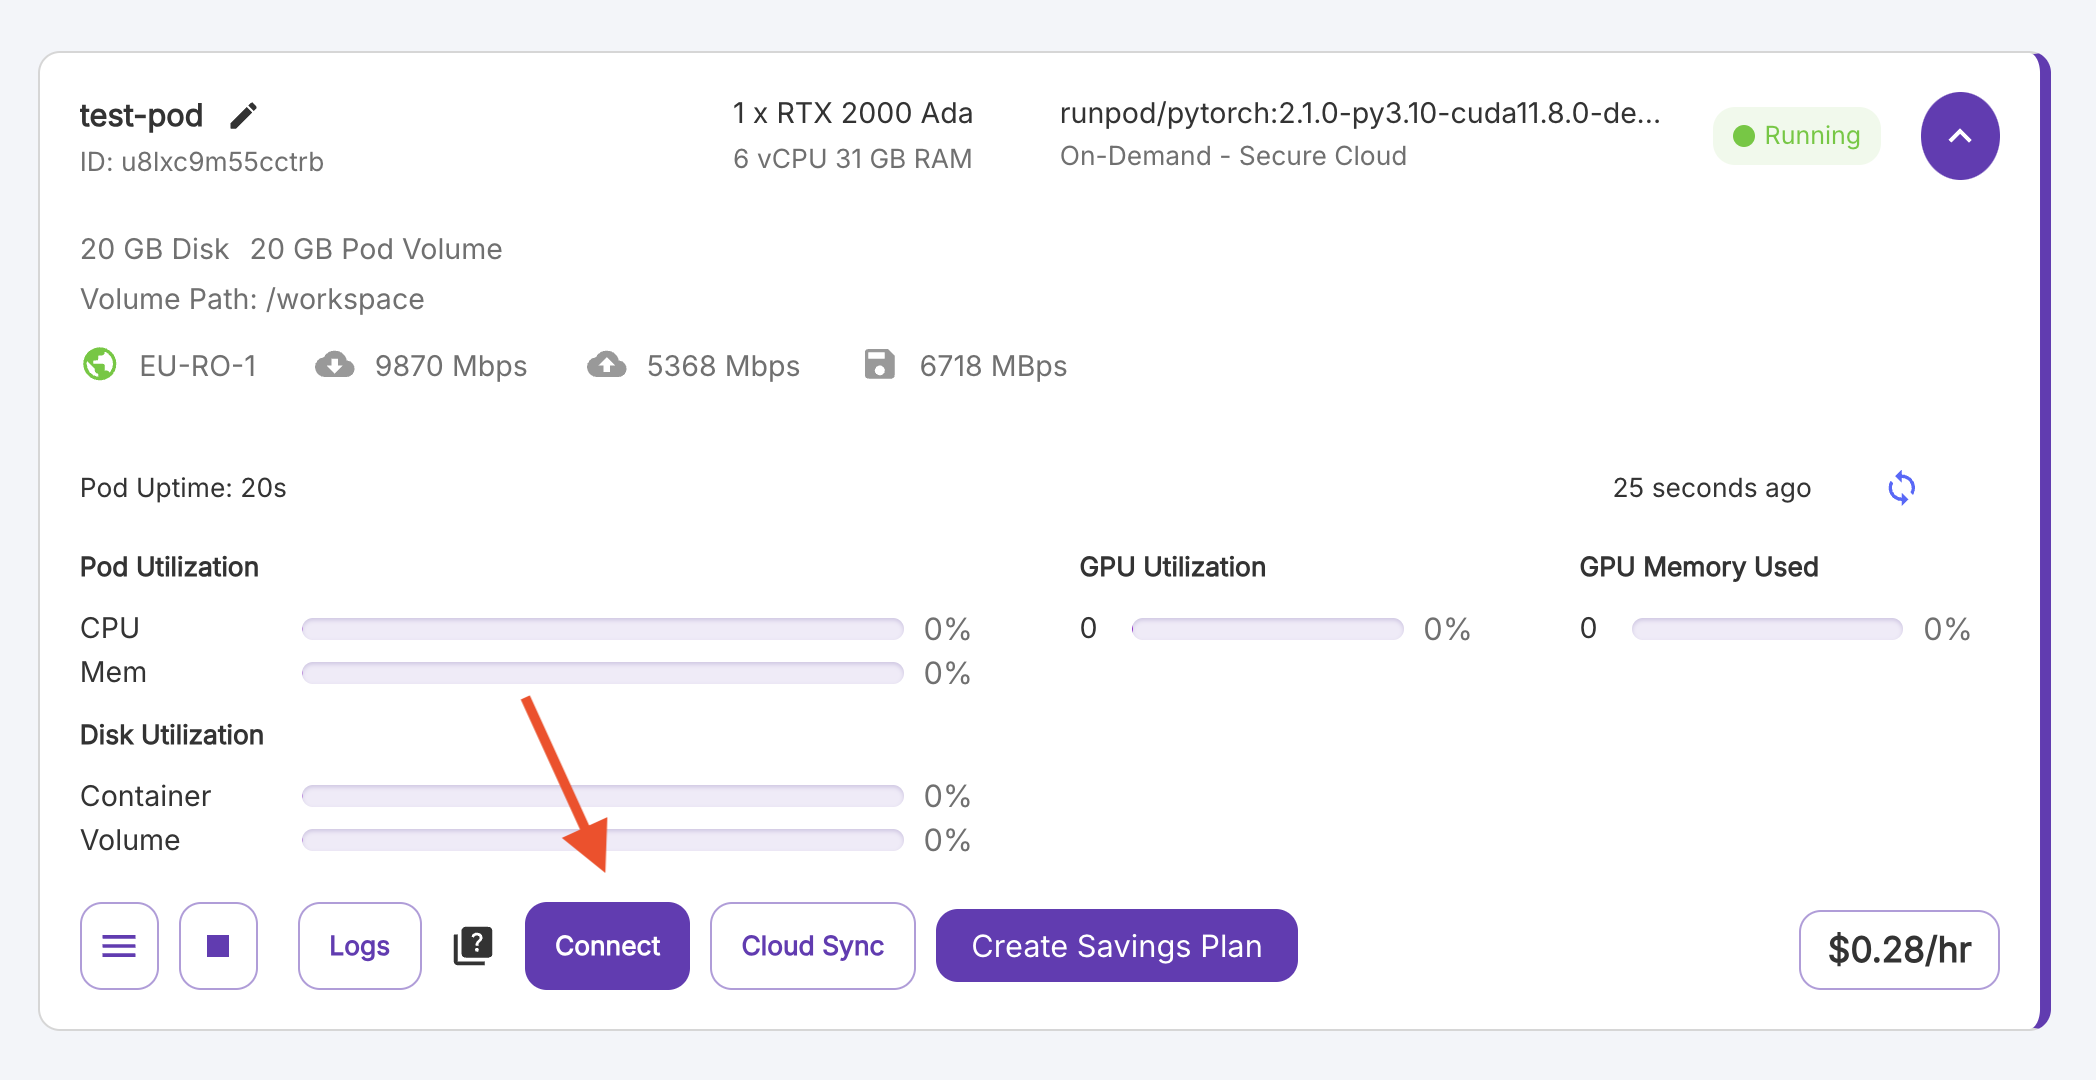
After your Pod has finished starting up (this may take a minute or two), you can connect to it:- On the Pods page, find the Pod you just created and click the Connect button. If it’s greyed out, your Pod hasn’t finished starting up yet.
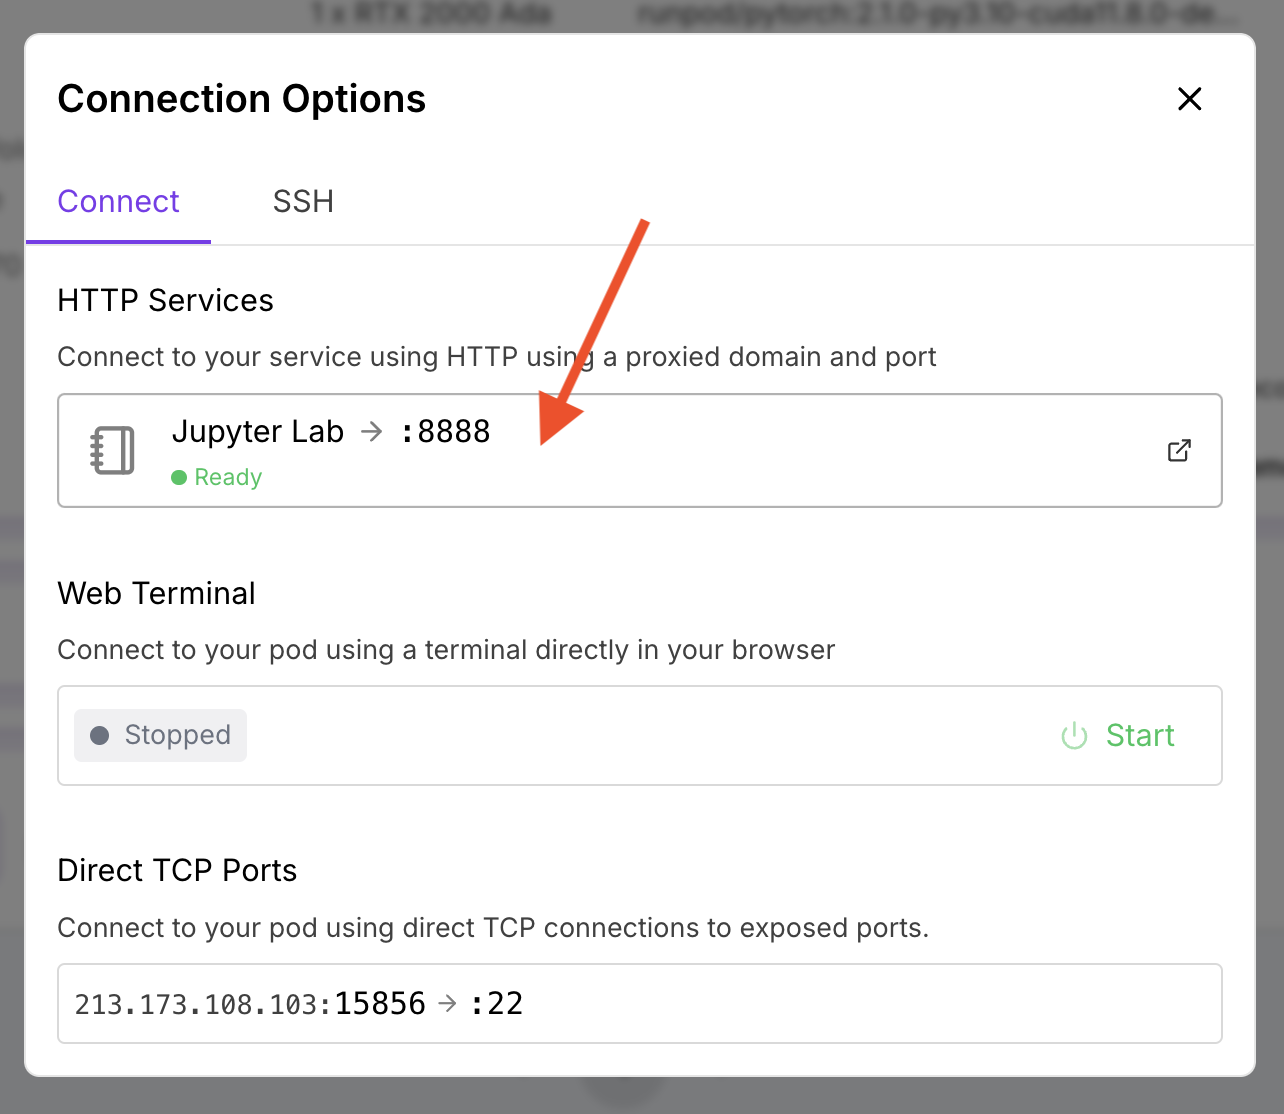
- In the window that opens, under HTTP Services, click Jupyter Lab to open a JupyterLab workspace on your Pod.
- Under Notebook, select Python 3 (ipykernel).
- Type
print("Hello, world!")in the first line of the notebook. - Click the play button to run your code.
Step 4: Clean up
To avoid incurring unnecessary charges, make sure to:- Return to the Pods page.
- Click the Stop button (square icon) to stop your Pod.
- Confirm by clicking the Stop Pod button.
- Click the Terminate button (trash icon).
- Confirm by clicking the Yes button.
Next steps
Now that you’ve learned the basics, you’re ready to:- Generate API keys for programmatic pod management.
- Connect to Runpod using the REST API or command-line interface (CLI).
- Choose the right Pod for your workload.
- Manage Pods using the web interface and CLI.
- Build production-ready applications with Serverless.
- Explore tutorials for specific use cases.
Need help?
- Join the Discord community.
- Reach out via email.
- Submit a request using the contact page.